
Deploy Serverless Kotlin App To Amazon AWS
In this article, we’ll implement a basic Kotlin function and deploy it as AWS Lambda. AWS Lambda is a serverless architecture which lets us to run code without managing servers and the main advantage of this architecture is, this function executes only when needed and scales automatically. AWS charges only for the compute time and there are no charges incurred when the code is not running.
For basic usage we no need to pay anything we just need AWS account. See this link for AWS lambda pricing. Free tier gets 1M requests and 40,000 GB-seconds of compute time per month. This limit is more than enough for our simple application.
I am going to use serverless CLI tool to develop our basic function. serverless: is a simple CLI tool helps us to create, manage and deploy lambda functions and it works with major providers (AWS, Azure, Google, Fn and many more). The main advantage of using this is, it provides single CLI interface for many providers so we no need to learn deployment process for each provider. To install it, make sure you have npm installed on your computer and execute below command;
$ npm install serverless -gThis command will install serverless globally.
This whole project is available here.
Create AWS Kotlin application
Lets create new Kotlin project. Go to terminal and execute below commands;
$ mkdir hello-kotlin
$ cd hello-kotlin
$ sls create --template aws-kotlin-jvm-maven
We created new folder hello-kotlin for our project and moved into it. sls is the shortcut command for serverless so I used short version. We are creating new project so mention create as sub-command by providing –template to it. In our case we need Kotlin project so I passed aws-kotlin-jvm-maven. Click here to see complete list of available templates for AWS.
Below are the list of files it created in my local
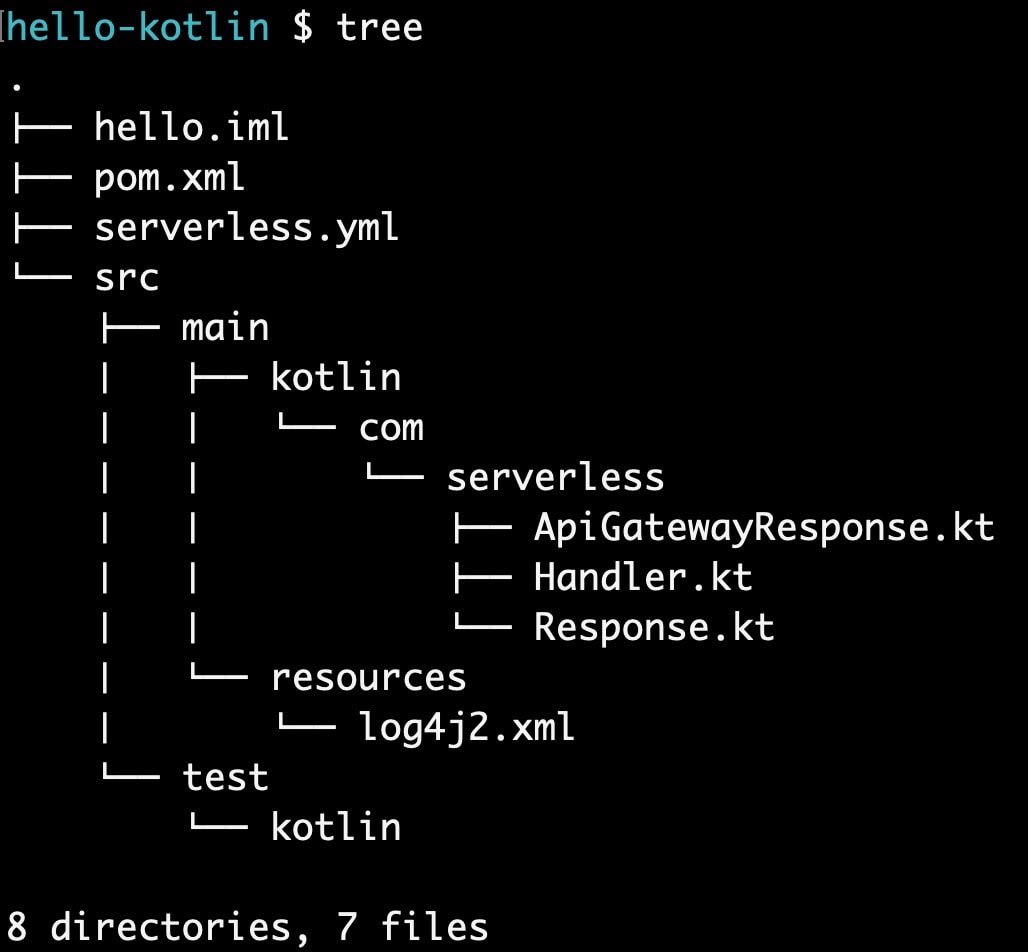
In the next section we will learn about the generated function and configuration.
Lambda function
Serverless generates a normal Kotlin project except with one special file serverless.yml. Serverless depends on this file because it contains the whole configuration needed to deploy and configure lambda. It also creates three Kotlin files out of them Handler.kt is the important file. Below is the content of this file;
class Handler:RequestHandler<Map<String, Any>, ApiGatewayResponse> {
    override fun handleRequest(input:Map<String, Any>, context:Context):ApiGatewayResponse {
        LOG.info("received: " + input.keys.toString())

        val responseBody = Response("Go Serverless v1.x! Your Kotlin function executed successfully!", input)
        return ApiGatewayResponse.build {
            statusCode = 200
            objectBody = responseBody
            headers = Collections.singletonMap<String, String>("X-Powered-By", "AWS Lambda & serverless")
        }
    }
    companion object {
        private val LOG = LogManager.getLogger(Handler::class.java)
    }
}
Class Handler implements RequestHandler interface which contains single function handleRequest. We need to implement this function because it is the starting point of lambda execution. AWS executes this function by passing input and context. These objects are needed if you want to read input from the request and context is to get the context of execution environment. handleRequest function uses two utility classes Response.kt and ApiGatewayResponse.kt to construct the Response. In this case we are building the response by setting statusCode to 200 and Response with some text and adding custom header ‘X-Powered-By’.
This is a simple function with out much functionality it just responds with some text.
Configuration
serverless.yml comes with basic configuration. I removed everything it comes with and replaced with below configuration.
service: aws-kotlin-jvm-maven
provider:
  name: aws
  runtime: java8
package:
  artifact: target/hello-dev.jar
functions:
  hello:
    handler: com.serverless.Handler
    events:
      - http:
          path: hello
          method: get
Properties in this file are self explanatory.
- service is a unique name for this function.
- provider contains provider specific configuration.
- package is the artifact name which is generated in the target folder at the build time.
- functions contains list of functions with there configuration. Each function needs the handler. Handler is the class which implements RequestHandler and we need to provide the events on which this function gets triggered. There are many ways to trigger functions like HTTP, CRON or event based. Here we want our function to get executed when it receives a HTTP request on hello path.
Configure credentials
In-order for serverless to connect AWS it needs our credentials because it will upload and deploy lambda on behalf of us. Follow below steps to configure this.
- Login into AWS Management Console
- Go to Security Credentials page by clicking on the user name at the top right of the page and selecting My Security Credentials from the drop-down menu.
- A confirmation dialog appears so click on Continue to Security Credentials
- Under Access keys click on Create New Access Key which will create new keys and displays them in the new dialog. Click on Show Access Key to view them. Remember to save these values because later you may need them for the reference and keep them securely.
- We need these access keys to set them in serverless so go back to the terminal and execute below command
$ sls config credentials --provider aws --key <Access Key ID> --secret <Secret Access Key>Replace Access Key ID and Secret Access Key with the values displayed in the AWS Console.
Build & deploy
We have configured our function and now lets build it. Since this is a maven application so we can either use IDE or maven commands to build our application. Here I used maven command to build the application;
$ mvn packageBuild got completed now lets deploy our app to AWS by executing below command;
$ sls deployIt takes some time to deploy. Once the deploy completes then the output shows some key information. Copy the endpoint which is displayed after deployment to your browser and hit. If everything goes normal then you should see response from our function. Our function responds with the message and HTTP headers.
URL will be like **https://
/dev/hello/create**
You can go to AWS lambda console to see more details about this function and also you can even test it from there.
Conclusion
We created a simple Kotlin function and deployed to AWS lambda using serverless. This function returns a text along with HTTP headers in the response. Click here to access the source code.