
Spring Cloud Configuration - Part 2

In Part 1 we created git repository and config server. In this article we will create a pet-store application which is also a client for the configuration server, because pet-store will request application properties from config server.
Create Configuration Client
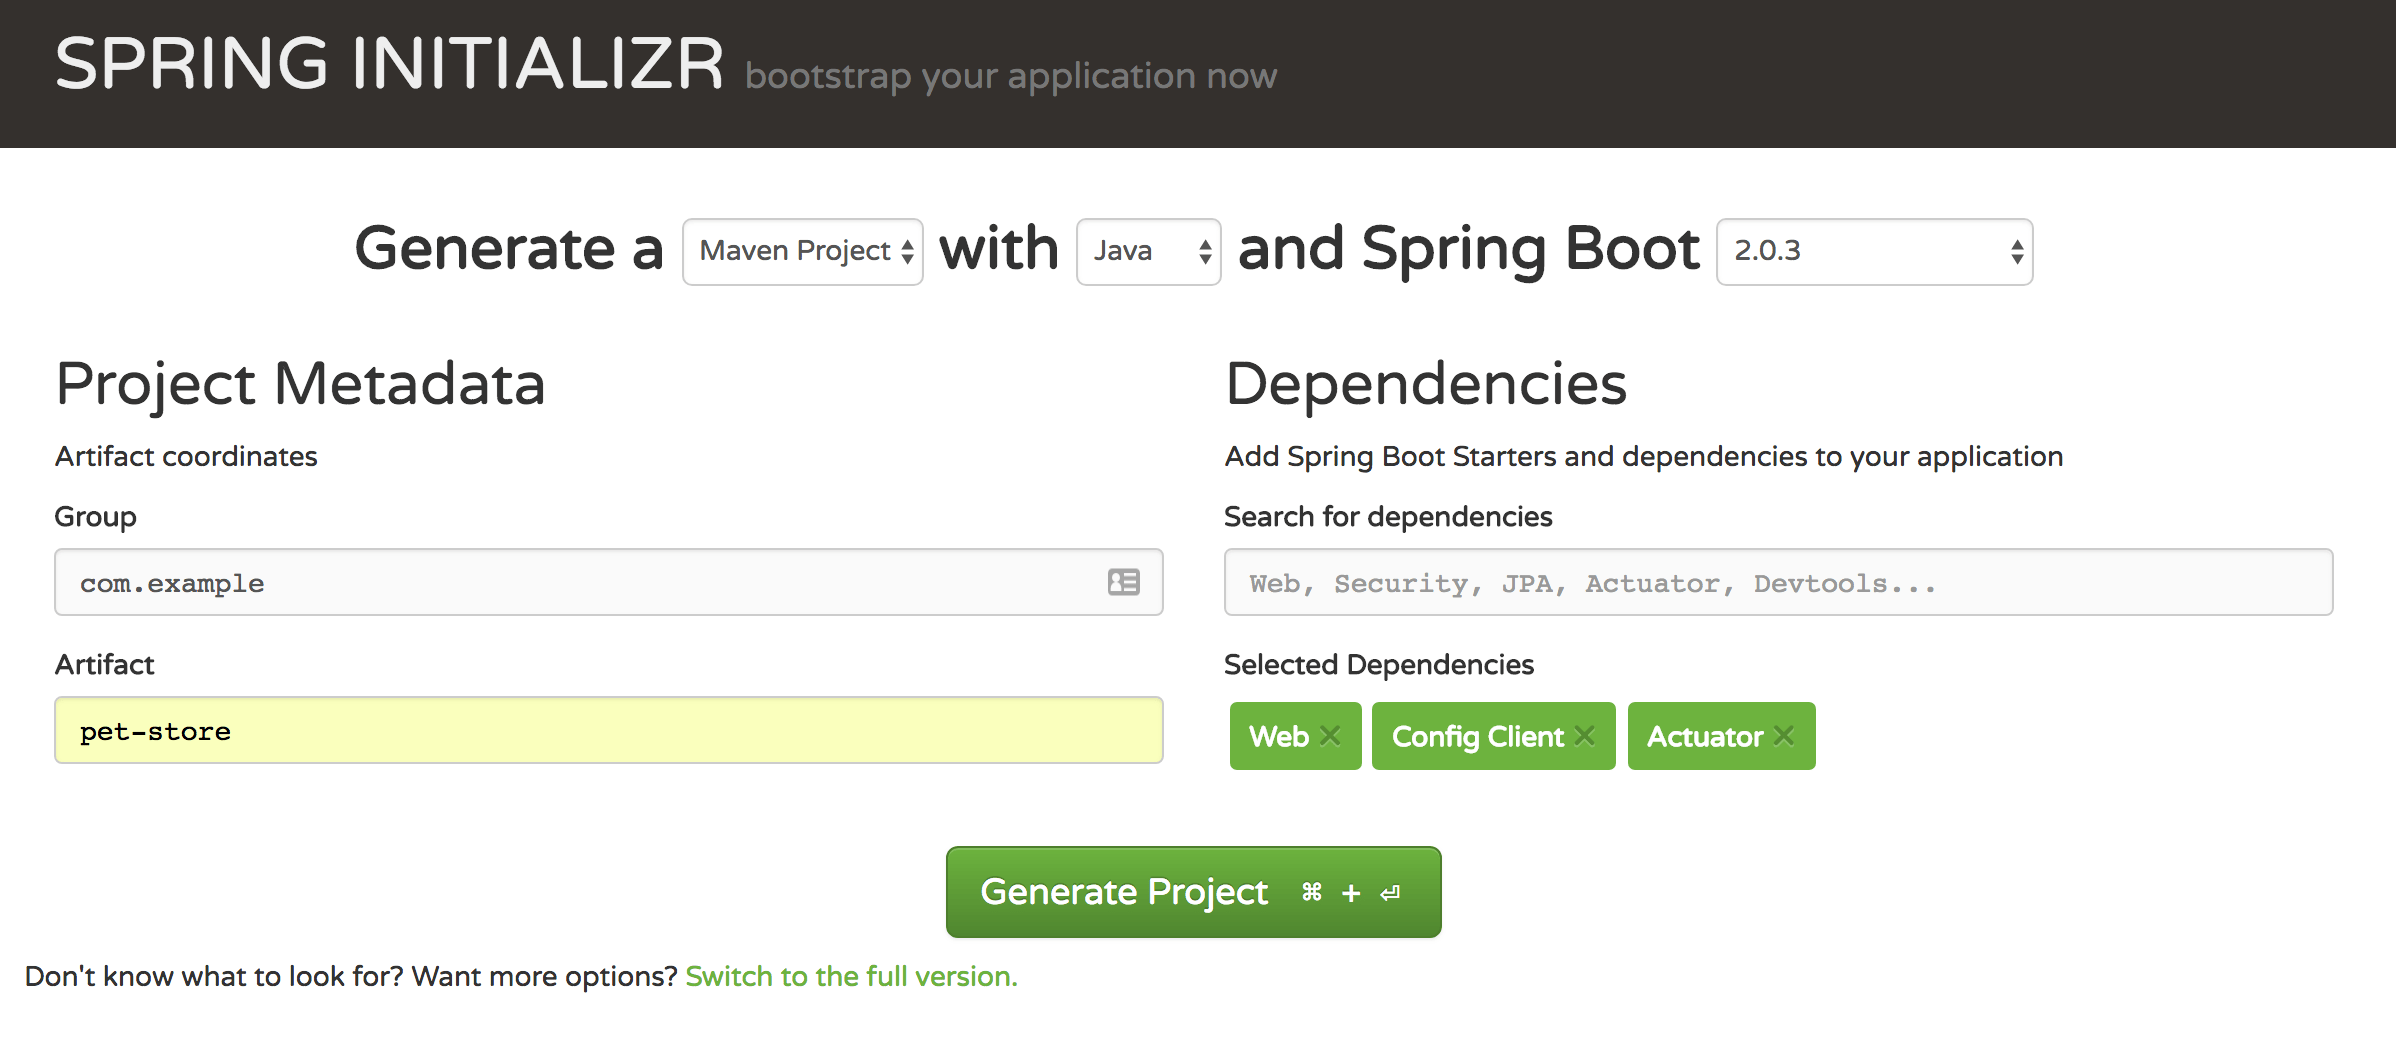
Go to start.spring.io to generate spring project with web, config-client and actuator as dependencies, see below image for reference.
Unzip and open the project in any IDE. We are going to configure pet-store app to load properties from config server so we no more need application.properties located at src/main/resources folder.
In-order for pet-store app to load properties from config server it needs config server connection details, because with out server machine name and port, pet-store can not connect to it. We can use bootstrap.properties to provide these details. Spring will load bootstrap.properties if it is available. bootstrap properties file should be used for only properties which are needed at application startup time, in our case we need server connection details so pet-store will use these details to connect and get properties from server at startup time.
Rename application.properties to bootstrap.properties and add below three properties in it.
File: bootstrap.properties
spring.application.name = pet-store // <1>
spring.profiles.active = dev // <2>
spring.cloud.config.uri = http://localhost:8888 // <3>
Above three properties are needed for config client to connect server.
<1> In a microservices environment multiple applications work together and this property will allow us to provide unique name for each application.
<2> Multiple instances of an application can exist like; dev, uat or prod so each of them are profiled with this property.
<3> Client will make HTTP call using this URL to get properties from config server.
Using all of the above properties client will construct the URL and it looks like this; http://localhost:8888/pet-store/dev this URL contains all of the above mentioned three properties; config url, application name and profile.
To verify if everything is working, we can create a REST end point which will return message property as response. Note that in Part 1 we added message property in pet-store-dev.properties. Config client will use above three properties to request properties from the server on startup and client gets message as part of the response from server.
Below is the REST controller which returns message;
@RestController
class MessageController{
@Value("${message}")
String message;
@RequestMapping("/message")
public String getMessage(){
return message;
}
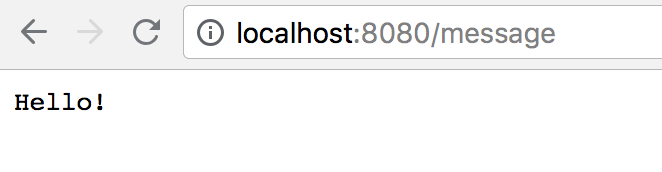
}Start pet-store application and in the browser open http://localhost:8080/message to get Hello! as response.
Update properties
In your local perform a small test; change message property in pet-store-dev.properties and save, then open http://localhost:8080/message it will not show updated property instead it returns old value. This is because changes to the property files are not automatically propagated to the clients. On the client side we need to manually trigger a refresh event which will request fresh copy again from the server and refreshes only the classes which are declared with @RefreshScope annotation.
In our case we update MessageController class to include @RefreshScope annotation so its message fields gets updated with new value.
@RestController
@RefreshScope
class MessageController{
	@Value("${message}")
	String message;

	@RequestMapping("/message")
	public String getMessage(){
		return message;
	}
}
Start pet-store application and open http://localhost:8080/message to see current value in the pet-store-dev.properties file. Lets update message in the properties file like below;
File: pet-store-dev.properties
message=Hello World!
management.endpoints.web.exposure.include=refresh
We will not see updated message value on http://localhost:8080/message. To get updated value we need to manually trigger refresh event. To trigger this event we need to make a HTTP POST request to pet-store client on /actuator/refresh end-point. I used curl command to make this request;
curl -X POST http://localhost:8080/actuator/refreshThis curl command will make a POST request, which will make client to again request the properties and these properties are only applied on the classes which are declared with @RefreshScope annotation.
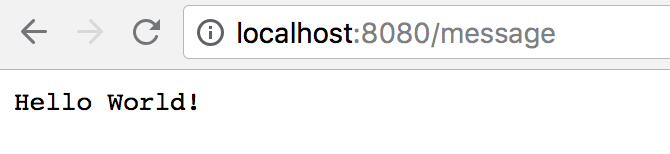
Open http://localhost:8080/message to see Hello World!
Conclusion
In this post we created a client application which depends on the config server to get properties and also used @RefreshScope annotation to update properties.